I stumbled on Floyd Finch's blog during a Google search and we struck up a nice conversation. Floyd was interested in writing a guest post for our blog; after reading his blog, I felt he would be a perfect fit. Floyd is an industrial designer & blogger residing in South Carolina. His love of motorcycles (and all other vehicles with wheels and/or engines) started at a young age. He spun wrenches for a living working at a couple of different motorcycle shops along the way, before moving into industry & going back to school. He still enjoys puttering around in his shop restoring & customizing old motorcycles & bicycles, going to shows, & writing about it all in his blog. We’ve all been there, that frustrating little moment when you realize that the blankety-blank screw you are trying to remove just isn’t coming loose without above normal effort on your part. First thing to do is to retrieve the screwdriver or wrench that you just tossed across the room in frustration. Now instead of springing into action stop for a second and plan your next move.
Step 1: Insure that you are using the proper tool for the job. For example make sure you don’t need to be using a JIS screwdriver instead of a Phillips, & that whether flat, Phillips, or JIS that you are using the correct size to match the screw that is bugging you. [caption id="attachment_4017" align="aligncenter" width="500"]
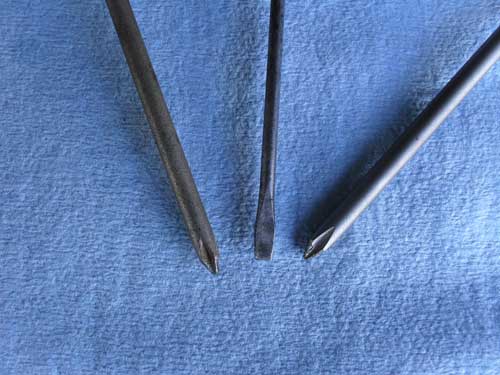
From left to right: Phillips, slotted & JIS screwdrivers[/caption] For hex head cap screws I always recommend using a good quality 6 point sockets or wrenches whenever possible. Since the vast majority of the nuts and bolts used on nearly everything in creation are six points, it just makes good sense to use the right wrenches. 12 point sockets & wrenches have their place but are much more likely to slip and round off a stubborn fastener than one specifically made for six sided nuts & bolts. [caption id="attachment_4019" align="aligncenter" width="500"]
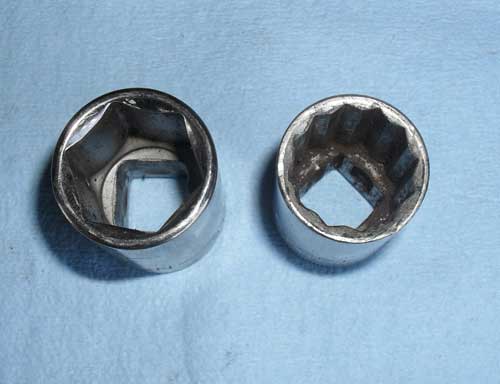
6 & 12 point sockets[/caption]
Be careful not to confuse metric & standard Allen keys either, some of them sort of interchange but trust me as soon as you are trying to loosen a stuck socket head screw the difference becomes very apparent.
Step 2: So you have got the correct tools but the bolt or screw still won’t budge or the head has been mangled beyond hope. The next step is to clean and lubricate the screws if possible, using a good quality penetrating oil, and if you are dealing with a bolt or screw that goes all the way through a part spray the oil on both ends of it and clean it if possible with a stiff brush. Soak everything down good & go have a beer or something, for a while then come back to try it, if the head of the fastener is still usable that is. If you have one that is damaged you’ll need to skip ahead a step or two. At this point it is worth mentioning that you should make sure you are not dealing with a reverse threaded bolt before you proceed. I once broke 2 wheel studs on a vintage Chrysler I once owned because I did not realize that the car had left hand threaded wheel studs on one side. It’s not likely to be the case but it is possible especially with reciprocating assemblies. In all honesty. if you are working on a vintage machine, especially a barn find or something you dragged up out of the woods somewhere this should have been your first step before you ever put the first tool to the metal. When I’m dealing with a really crusty pile of junk I spray every bolt & screw I can reach several times a week for at least 2 weeks before I even start on it. At this point it’s worth trying an impact driver on Phillips & slotted screws just to see if they will budge. Or if the head is destroyed try using a center punch and hammer to drive the screw around in the direction needed to remove it. Sometimes it works and sometimes it won’t. [caption id="attachment_4021" align="aligncenter" width="500"]
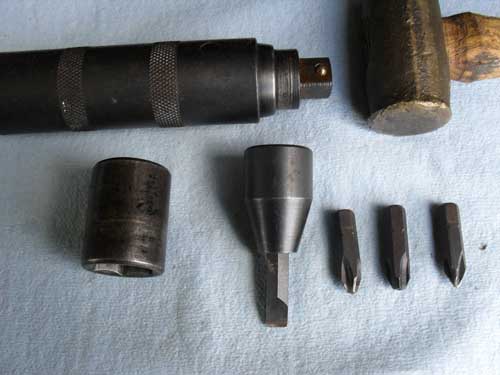
Hand impact driver & accessories[/caption] Now if it still won’t move it is time to try a little bit of heat. On aluminum or magnesium parts use an electric heat gun. Oxy-acetylene torches can melt or destroy aluminum & will ignite magnesium, which would have horrible consequences. In fact you should be very careful with the hot air gun if you have any magnesium parts as most alloys will ignite at around 850 degrees Fahrenheit. Of course if you are dealing with steel you can use flame torches but use common sense personal protection and be careful not to do any unwanted damage. Heat up the nut or the part that the bolt is screwed into and then carefully without burning yourself remove the bolt or screw. If your screw or bolt still will not move now is the time to decide whether to try to drill it out or cut it off. If the screw is one holding something in place like an engine side cover or any other part that will leave a portion of the screw shank protruding go ahead and drill, or grind the head off of the bolt or screw and remove the part. A lot of times once you remove the head the rest of the bolt will come out easily because the tension on it has been released. I can give you a particular example of this. On 1960’s through 1980’s Honda motorcycle engines the oil filters were housed in an aluminum casting usually bolted directly to the center of the engine. A lot of owners and service technicians were very paranoid about the possibility of an oil leak directly in front of the rear tire, and greatly over tightened the large center bolt that holds the oil filter & housing into place. These bolts are often galled into place & need to have the heads ground off to remove them. The interesting thing is that the bolt seizure does not occur at the threads inside the engine but where the flange of the bolt rests on the outside of the filter housing. Once you grind the head away the bolt will usually unscrew with just your fingers. Or if you need to grab it tightly with a pair of locking pliers and turn it out. [caption id="attachment_4023" align="aligncenter" width="500"]
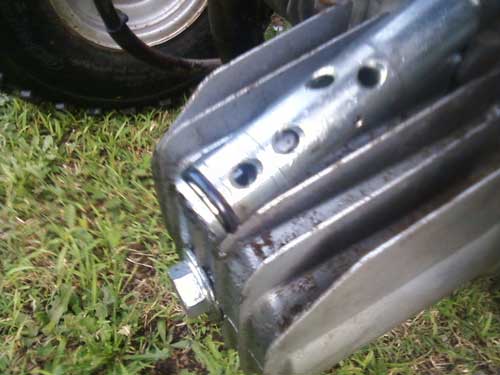
Honda oil filter bolts[/caption] For through bolts with a nut on the other end use whatever safe methods you prefer to cut either the nut off or the bolt into two pieces and remove them. One tip I will give you if frequently encounter damaged fasteners is to get yourself a set of quality left handed drill bits. I have been pleasantly surprised a number of times when the broken fastener that I was trying to remove simply backed out of the hole under pressure from the drill. This brings me to the next thing; dealing with bolts that are broke off level with or recessed into a casting or part. If you’re lucky the bolt will be broken in such a way that you can get a center punch to make a good dimple directly in the center of the broken bolt. Then using plenty of cutting oil, drill through the fastener in steps until it is almost completely drilled out. Now is the time you should attempt to remove it using a screw extractor. Screw extractors are a mixed blessing I have a set that I have been using for years but as anyone who has ever had to deal with removing a broken extractor will tell you, removing a broken one is a nightmare. Try the easy out if you have one, always use the largest size that you can, but if the bolt does not come out fairly quickly , put the extractor away & just drill the bolt completely out and re-tap the hole or install an insert. [caption id="attachment_4025" align="aligncenter" width="500"]
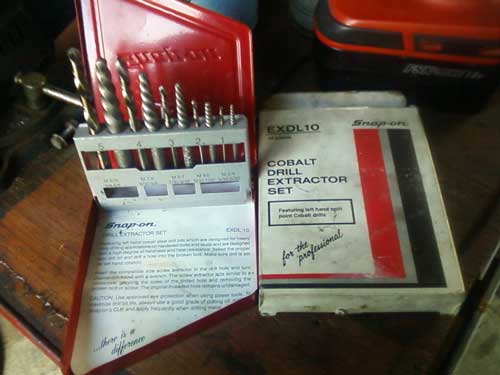
Screw extractor set[/caption] If the bolt you are trying to remove is broken in such a way as to preclude simply punching it and drilling it more ingenuity is required. It may be possible with a hand held grinder or Dremel type tool to flatten it enough to punch it in the center. I have in the past fabricated bushings or guides to hold the drill bit centered but sometimes this just leads to a broken drill bit. The best way for you to handle a broken bolt or screw if all other methods fail, is to have a machinist clamp it to his milling machine and cut the bolt out with an end mill. I am interested in reading any tips you might have for dealing with stuck or broken fasteners as well, who knows we might all learn something, so please share in the comments section below. Peace Y'all Motorcycles, Bicycles, & Freedom! visit
http://www.motopsyco.com